REMIX Tips
Generate and Deploy DApp UI with Quick DApp Plugin
The Quick DApp plugin in REMIX simplifies the process of creating and deploying decentralized applications (DApps). This tool automates the generation of a user interface (UI) for your smart contracts and facilitates quick deployment to the Surge platform.
-
Activate the Plugin
Open REMIX IDE and navigate to the Plugin Manager tab. Search for Quick DApp and click Activate.
-
Select Your Contract
Choose the smart contract you want to deploy from the Deploy & Run tab. The plugin will automatically identify your contract and generate a corresponding UI.
-
Configure the UI
You can customize the UI components based on the functions of your smart contract. The plugin allows you to specify which functions to expose to the user interface.
-
Setup Surge
# install surge
npm install --global surge

# create login
surge login -
Deploy to Surge
Once your UI is configured, click the Deploy button. The plugin will handle the deployment process to Surge, providing you with a public URL to access your DApp.
Connect to Your Local Filesystem
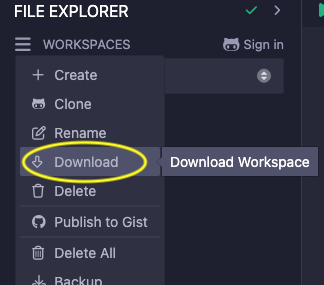
If you prefer working with contracts on your local filesystem, Remix can connect directly to it. Keep in mind that connecting to your local filesystem will switch your current workspace. If you want to keep working on contracts from your current workspace, make sure to download them first.

To enable seamless integration between Remix IDE and your local development environment use the remixd tool. This allows you to easily manage and edit your smart contract files directly from Remix IDE. Follow these steps to establish the connection.
-
Install Node
As a prerequisite install Node, e.g., using Volta (which will also install
npm):# install Volta
curl https://get.volta.sh | bash
# install Node
volta install node -
Install REMIXD
Install the REMIXD tool globally on your machine by running the following command in your terminal:
npm install -g @remix-project/remixd -
Run REMIXD
After installation, launch the REMIXD server by specifying the directory you want to share and the REMIX IDE URL. Replace
<YOUR_DIRECTORY>with the path to your local project folder:remixd -s <YOUR_DIRECTORY> -u https://remix.polkadot.io -
Activate REMIXD plugin in REMIX
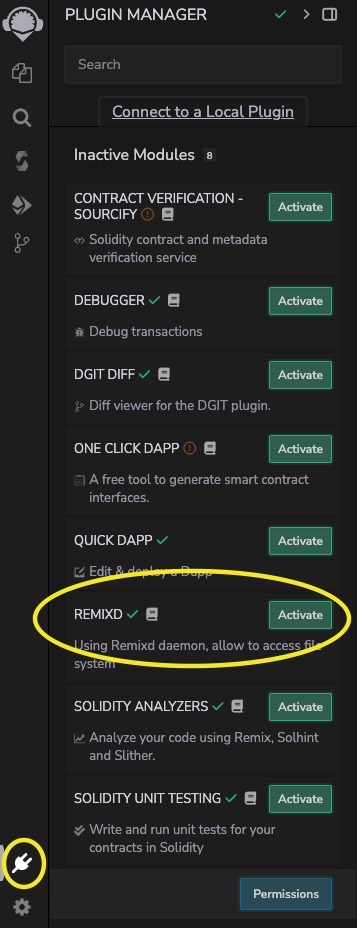
Go to the Plugin Manager tab. Find REMIXD, click Activate, and then select Connect to link your local directory with the IDE.
